→ https://www.fablabo.net ←
Run 2000 : Différence entre versions
(→-Inversion des couleurs pour le capteur lumière) |
(→-Inversion des couleurs pour le capteur lumière) |
||
| (Une révision intermédiaire par le même utilisateur non affichée) | |||
| Ligne 133 : | Ligne 133 : | ||
avec-light.png|Inversion des couleurs | avec-light.png|Inversion des couleurs | ||
<gallery> | <gallery> | ||
| + | |||
| Ligne 141 : | Ligne 142 : | ||
} | } | ||
} | } | ||
| + | |||
==== -Split screen ==== | ==== -Split screen ==== | ||
| + | |||
| + | |||
<gallery mode="packed"> | <gallery mode="packed"> | ||
| − | + | split.png|SplitScreen1 | |
| − | + | split2.png|SplitScreen2 | |
</gallery> | </gallery> | ||
| + | |||
| + | |||
//si le bouton 1 est actif on active le premier split screen | //si le bouton 1 est actif on active le premier split screen | ||
Version actuelle en date du 17 avril 2018 à 08:16
Run 2000, est un modificateur de video tangible.
Contributeur·ice·s
Statut du projet
Experimental
Statut de la publication
Finalisé
License
CC-by-sa-3.0 - Creative Commons Attribution CC-by-sa-3.0 France
Inspiration
Forest gump
Machines
Matériaux
L'équipe
- Capture d’écran 2018-04-17.png
- Capture d’écran 2018-04-17.png
- Capture d’écran 2018-04-17.png
- Capture d’écran 2018-04-17.png
Concept
Devenez le réalisateur, vos mouvements et actions sont visibles à l'écran.
Au cours d'un atelier de quatre jours à Plateform C, nous avons créé un modificateur de vidéo tangible. Il fonctionne avec trois capteurs différents pour créer toutes les modifications. Grâce à un capteur de distance, l'utilisateur peut ralentir ou accélérer la vidéo en déplaçant le cube de gauche à droite. Le capteur de luminosité peut saturer l'image lorsqu'on approche une source de lumière. Lorsque vous touchez plus ou moins fortement le capteur de pression, un blur apparaît sur la vidéo. Enfin, dernière interaction, il y a deux fentes sur une face du cube dans lequel l'utilisateur peut passer une lame pour couper horizontalement ou verticalement la vidéo. Dans cette expérience, c'est l'humain qui interagit directement avec son corps et ses mouvements.
Le cube
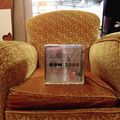
Le cube a été construit avec des plaques PMMA pour la transparence, nous voulions que la carte photon et les fils soient visibles à l'intérieur. Les six faces du cube sont maintenues entre elles avec du scotch argenté, en accord avec notre thème les années 2000. Nous avons réalisé le logo et les pictogrammes à la découpeuse vinyle.
Le cube modifie une vidéo retransmise sur un vieil écran d'ordinateur cathodique.
Programmation du cube
Code Processing :
Telecharger le code processing entier final: File:test3.pde
-Mise en aléatoire des vidéos
int dernier; int encours; int num_movies = 8; import processing.video.*; import processing.sound.*; import http.requests.*; SoundFile file;
Movie m1, m2, m3;
Movie[] movies = new Movie[num_movies];
Movie currentMovie;
int time =0;
void setup() {
 //On met la fenetre à la taille de l'écran
 size(displayWidth, displayHeight);
 //On importe le fichier
 file = new SoundFile(this, "Moderat.wav");
 file.loop();
 //On met la musique en boucle

 for (int i = 0; i < movies.length; i++) {
   movies[i] = new Movie(this, nf(i, 2, 0)+".mov");
 //On installe une sélection aléatoire des vidéos (qui vont de 00.mov à 07.mov)
 }
 encours = 0;
 dernier = encours;
 currentMovie = movies[encours];
 currentMovie.play();
}
void draw() {
 if (millis() >= time + currentMovie.duration()*1000) {
   dernier = encours;
   encours = nouveau(dernier);
   currentMovie.stop();
   time = millis();
   currentMovie = movies[encours];
 }
 //La vidéo qui se lance sera toujours différente de la précédente mais ne se lancera que lorque que la précedente sera finie
   currentMovie.play();
 image(currentMovie, 0, 0, width, height);
}
int nouveau(int dernier) {
 boolean ok = false;
 int r = dernier;
 while (!ok) {
   r = int(random(num_movies));
   println(r);
   if (r != dernier) {
     ok = true;
     dernier = r;
   }
 }
 println("-");
 return r;
}
void movieEvent(Movie m) {
 m.read();
//On lit la vidéo
}
-Inversion des couleurs pour le capteur lumière
- Filter(INVERT);
- ==== -Split screen ====
//si le bouton 1 est actif on active le premier split screen if(button1Value==1)
 {
   image(currentMovie, width/2, 0, width, height);
   //println(opticalInterupt+"opticalInterupt");
 }
 else
 {
   println("no valuer");
 }
//si le bouton 2 est actif on active le second split screen
 if(button2Value==1)
 {
   image(currentMovie, 0, height/2, width, height);
   //println(opticalInterupt2+"opticalInterupt2");
 }
 else
 {
   println("no valuer2");
 }
//sinon pas de split screen
-Glitch
void draw() {
image(m, 0, 0, width, height); // On affiche la vidéo

//si la pression est faible le glitch est minime
if (pression < 1500){
glitch();
}
 //si la pression est forte le glitch est intense
if (pression >=1500){
glitch();
glitch();
glitch();
glitch();
glitch();
glitch();
}
 // 10 bandes horizontales étirées en largeur
 for (int i = 0; i < 10; i++) {
   // copy(m, 0, 150+i*10, width, 5, 0, 150+i*10, int(width*1.1), 5);
 }
}
void movieEvent(Movie m) {
m.read();
}
void glitch(){
  a = int(random(width)); //valeurs random
  b = int(random(height));
  c = int(random(width));
  d = int(random(height));

 // On copie m à 140 en x et 260 en y, sur 600 px en x et 50 px en y,
 // puis on on affiche cette copie à 140 en x et 260 en y (au même endroit donc)
 // mais cette fois la taille affiché sera 600 en x (comme avant) et 150 en y (3 fois plus haut)
copy(m, 200, 260, 600, 50, a, b, c, d); //carré en random
 noStroke(); // pas de contours
 fill(random(255), random(255), random(255), 35); // random color
 rect(a, b, c, d); // rectangle transparent dessus
}
Code Photon:
Telecharger le code photon entier final: File:photon.ino
This #include statement was automatically added by the Particle IDE.
- include <TM1637Display.h>
// This #include statement was automatically added by the Particle IDE. //#include <TM1637Display.h> /* Ping sensor HC-SRO4 + grove 4-digit display
- /
//#include <TM1637Display.h>
- define CLK 2
- define DIO 3
TM1637Display display(CLK, DIO);
int trigPin = D4; int opti = D1; int opti1 = D0; int echoPin = D5; float v = 331.5 + (0.6 * 20); int broche_flex = A0; int lightInput=A2; int button1=D6; int button2=D7;
double button2Value;
void setup() {
 display.setBrightness(0x0d);
 Serial.begin(9600);
 pinMode(trigPin, OUTPUT);
 pinMode(echoPin, INPUT);
 pinMode(trigPin, OUTPUT);
 pinMode(broche_flex, INPUT);

 pinMode(opti,INPUT);
 pinMode(opti1,INPUT);
 pinMode(lightInput,INPUT);
 pinMode(button1,INPUT);
 pinMode(button2,INPUT);
}
void loop() // <3> {
 double opticalInterupt = digitalRead(opti);
 double opticalInterupt2 = digitalRead(opti1);
 double lightValue=analogRead(lightInput);
 double button1Value=digitalRead(button1);
 button2Value=digitalRead(button2);
 float d=distanceCM();
 float flex_capture = 4095 - analogRead(broche_flex);
 //boolean appuyer=false;

 display.showNumberDec(d);
 display.showNumberDec(flex_capture);//Display the Variable value;
 display.showNumberDec(opticalInterupt);
 display.showNumberDec(opticalInterupt2);
 display.showNumberDec(lightValue);
 display.showNumberDec(button1Value);
 display.showNumberDec(button2Value);

 Serial.println(d);
 Serial.println(flex_capture);
 Serial.println(opticalInterupt);
 Serial.println(opticalInterupt2);
 Serial.println(lightValue);
 Serial.println(button1Value);
 Serial.println(button2Value);
 //Display the Variable value;
 //wait 100 milliseconds so we don't drive ourselves crazy
 delay(100); // ms
 envoyerJson(d, flex_capture,opticalInterupt,opticalInterupt2,lightValue,button1Value,button2Value);
} // float Turnigy() // { // digitalWrite(Turnigy,LOW); // }
float distanceCM(){
 // send sound pulse
 digitalWrite(trigPin, LOW);
 delayMicroseconds(3);
 digitalWrite(trigPin, HIGH);
 delayMicroseconds(5);
 digitalWrite(trigPin, LOW);
 // listen for echo Pin
 float tUs = pulseIn(echoPin, HIGH); // microseconds
 float t = tUs / 1000.0 / 1000.0 / 2; // s
 float d = t*v; // m
 return d*100; // cm
}
void envoyerJson(float distance, float pression,float o,float o2,float l1,float b1,float b2) {
String json;
//On envoie les données à processing
 //json = "{\"controle\":{\"pot1\":";
 json = "{\"distance\":";
 json = json + String(distance);
 json = json + ",\"pression\":";
 json = json + String(pression);
 json = json + ",\"opticalInterupt\":";
 json = json + String(o);
 json = json + ",\"opticalInterupt2\":";
 json = json + String(o2);
 json = json + ",\"lightValue\":";
 json = json + String(l1);
 json = json + ",\"button1Value\":";
 json = json + String(b1);
 json = json + ",\"button2Value\":";
 json = json + String(b2);
 json = json + "}";
Serial.println(json);
}


